This post was last updated on July 26th, 2024 at 11:43 am.
This is the last of our four-part series on the unique IconCMO linking feature between your donations module and your accounting system. Your donation-accounting links give you
- the power to accurately record donations and accounting entries at the same time,
- the power to clearly account for donation revenues,
- and the power to honor donors’ trust that their donations will be used according to their wishes.
Part 1 deals with the basics of how to set up your links.
Part 2 shows the results you can get with your financial reports and donation statements.
And Part 3 elaborates on the flexibility of the linking feature and shows how it can be used to record donations from a special event.
Now in part 4, we’ll look at how you can use IconCMO’s accounting link to record pass-through donations.
What do I mean by pass-through? These are donations that the church collects on behalf of another organization.
Let’s run through a standard pass-through scenario. We’ll say our fictional church from parts 1-3 is collecting monetary donations on behalf of a food pantry.
- Joe Smith gives $80 and Mary Jones gives $40 on April 21.
- The church deposits the $120 into its Wonderful National Bank checking.
- The church writes out a check for the full $120 to the food pantry on April 25.
Accounting Setup
We need an accounting fund to designate the money that’s to be passed on to the food pantry. I’ll call it “Food Pantry Pass-Through” and create it in General-Ledger: Accounting Funds.

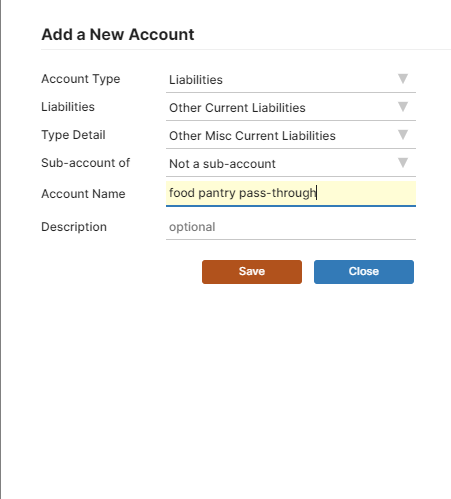
The big difference between this and other kinds of donations is that we don’t use a revenue account. The donations aren’t really the church’s revenue. The money is owed to the food pantry, so when it comes in, it needs to be recorded as a liability. To create the liability account, I’ll go to General-Ledger: Chart of Accounts and click on ‘Add New Account’ in the upper right. Here’s how to set up the liability account to link it to the donations.

Donations Setup
Now we’ll create a donation fund in Donations: Funds & Donations. The donation fund is what will show up on the donors’ donation statements.
First we’ll make the donor fund. Below when you click the ‘Add New Fund’ button the new fund is added with a generic name called ‘A New Fund XXX’. You will need to give the fund a name such as ‘Food Pantry Gifts’. Then fill out the remaining information like fund dates, fund type, and pledges if needed.

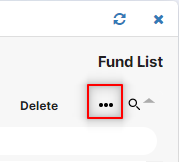
To link the donation fund to the accounting side we need to fill in the columns called Accounting Fund, Checking (Debit) and Revenue/Liability (Credit) in the same screen. If you do not see these columns to the right of the fund name, please click on the three dots like the ones below.

When you click the three dots you should see a bunch of column names with a checkbox next to them. By check marking the boxes, the columns appear on the main screen for your viewing. Check mark the three columns needed to link the accounting –> Accounting Fund, Checking (Debit) and Revenue/Liability (Credit). Then click the ‘Close’ link as seen below.

Then, we’ll fill out the dropdown list as you see below.

Now, on the same screen you can create a batch to add donations. Adding batches is very similar to the way we added the donation fund above. You click the ‘Add New Batch’ button then name the batch to what ever you like. Once the batch is named click on the blue link for the donation amount which for a new batch would be $0.00 and it will take you to the donation entry window, like the one seen below.
You would use the + (plus) sign icon to add another row into the screen and fill out the appropriate information for each donation like donor, date, amount, and fund. The rest of the information is optional.

After entering all the donations you will exist the View/Enter Donation window and come back to the main Funds & Donations window. You can send this batch to accounting now by clicking the ‘Send to Accounting’ link as seen below.

After the donation batch is sent to the accounting side you can see what the accounting entry looks like.
- $120 is debited to the BB Checking account.
- $120 is credited to the Pass Through liability account.
- This is recorded in the Pass-Through accounting fund.

Now our Pass-Through accounting fund has a $120 balance for the check book and a $120 liability to pay off. When you write your check out for the food pantry, you’ll want to be sure to debit the pass-through liability account and choose the Pass-Through accounting fund. This would zero out the liability as its not owed anymore and the money comes from the checkbook.
Photo by Possessed Photography on Unsplash
I have misplaced parts 1,2,& 3. Please resend them.
Larry,
Towards the top of the post there’s links for the other parts. But here they are for easy access. Thanks
Part 1 deals with the basics of how to set up your links.
Part 2 shows the results you can get with your financial reports and contribution statements.
Part 3 elaborates on the flexibility of the linking feature and shows how it can be used to record donations from a special event.