This post was last updated on July 19th, 2024 at 10:24 am.

It’s easy to make accounting mistakes. The IconCMO fund accounting system is very flexible and has many options for correcting these mistakes.
In this post, we’ll run through different types of common accounting mistakes and the best possible ways to correct them.
If you’re looking for more general information on fixing errors in double entry accounting, we recommend Patriot Software’s blog post on correcting entries for mistakes in accounting books. IconCMO’s tools for fixing accounting errors automatically make the adjustments / reversals described in that blog post.
We’ve written previously about errors clients can make in how they set up their accounting system, especially about problems setting up checking accounts. Feel free to refer to our post on checking account mistakes. This post will focus on mistakes in actually entering transactions.
Here’s a rundown of how to fix such mistakes.
Common Accounting Mistakes
There are different places you can fix mistakes, but I’ll focus on how to make corrections in the GL – Register. This window has the most options for fixing mistakes.
Reversing Entries
If you entered a transaction with any incorrect data, deleting it used to be the only option. It is still a valid option, if you prefer to have a reversing entry created in the system. IconCMO now has an audit log that tracks all changes made to accounting entries, making the once very necessary reversing entries, redundant. That audit trail protects the church from cases – or suspicions – of embezzlement and fraud.
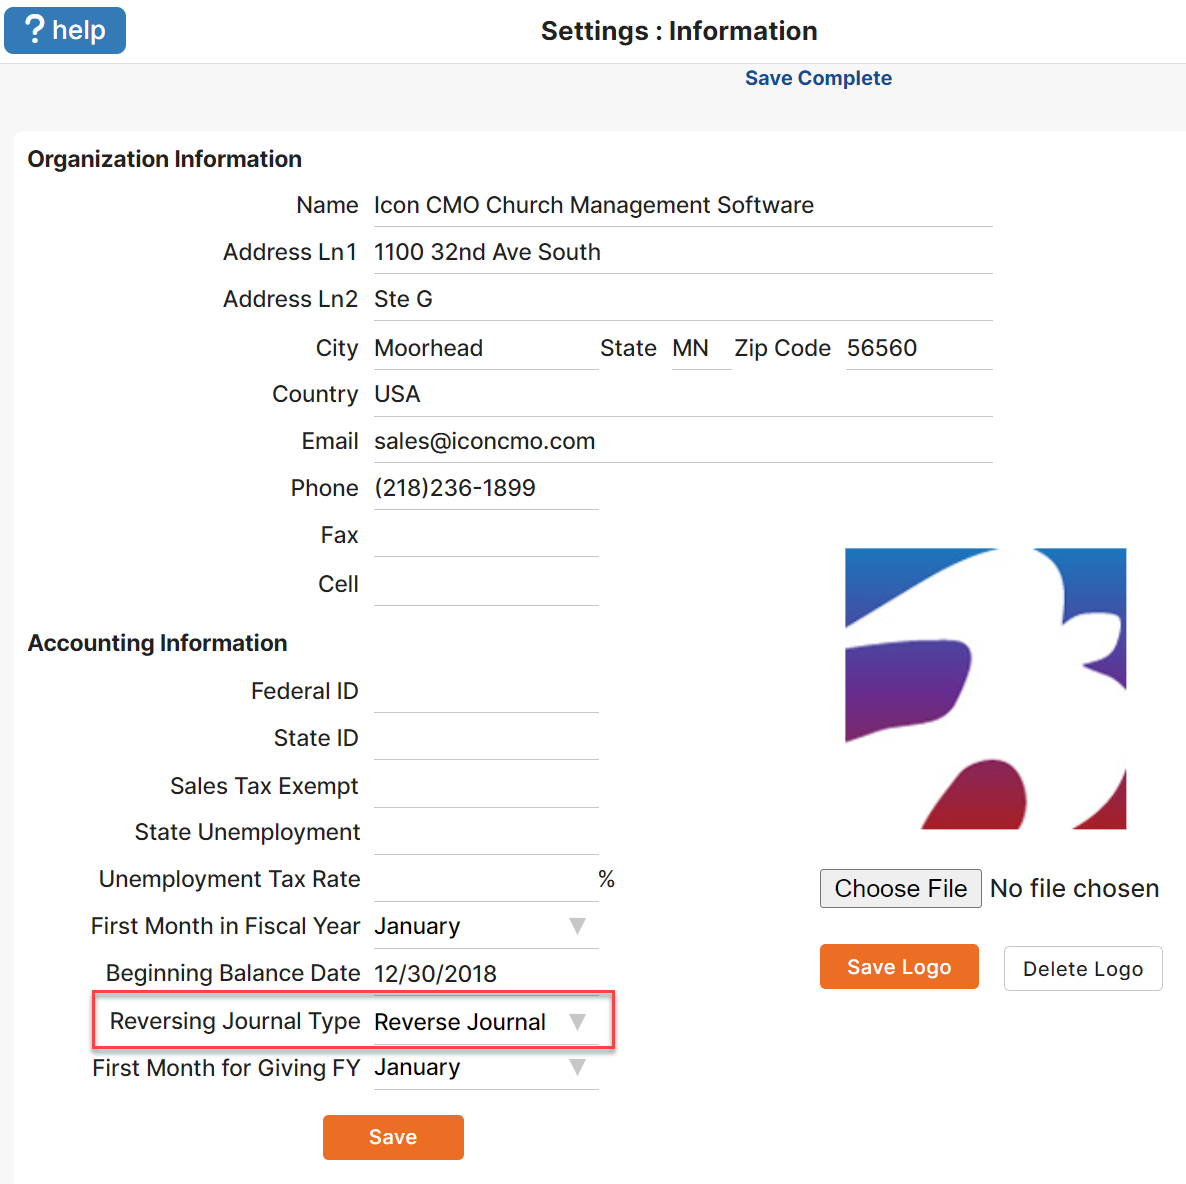
To create a reversing entry, the reversing journal type must be set as ‘Reverse Journal’. This option is found on the Information screen under the Settings menu.
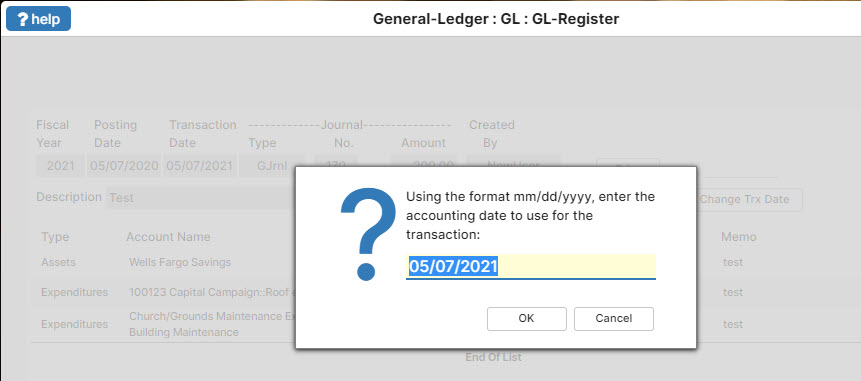
Then, you can look up the transaction in the GL – Register, click on it to open the transaction details, and click the ‘Void’ or ‘Delete’ button. You’ll get a prompt asking what transaction date you want to use for the reversing entry, you almost always want to choose the same date as the original transaction date.
As a result, the original amounts of the transaction are offset on the same day. You may want to use a later accounting date for your reversal if you’ve already had reports approved when the original transaction happened. Then, the offsetting debits and credits will show up in later reports and the original reports will remain unchanged.
After deleting the transaction, you’ll have to re-enter the transaction with the correct information.
Accounting Mistake #1: Wrong Amount
If you are satisfied with the audit log and do not wish to create a reversing entry, you can change the amount of almost all transactions without deleting the entry.
Look up the transaction in the GL – Register, click on it to open the transaction details, and update the dollar amounts. Debits and credits must balance, so if you update one you will need to update the other.
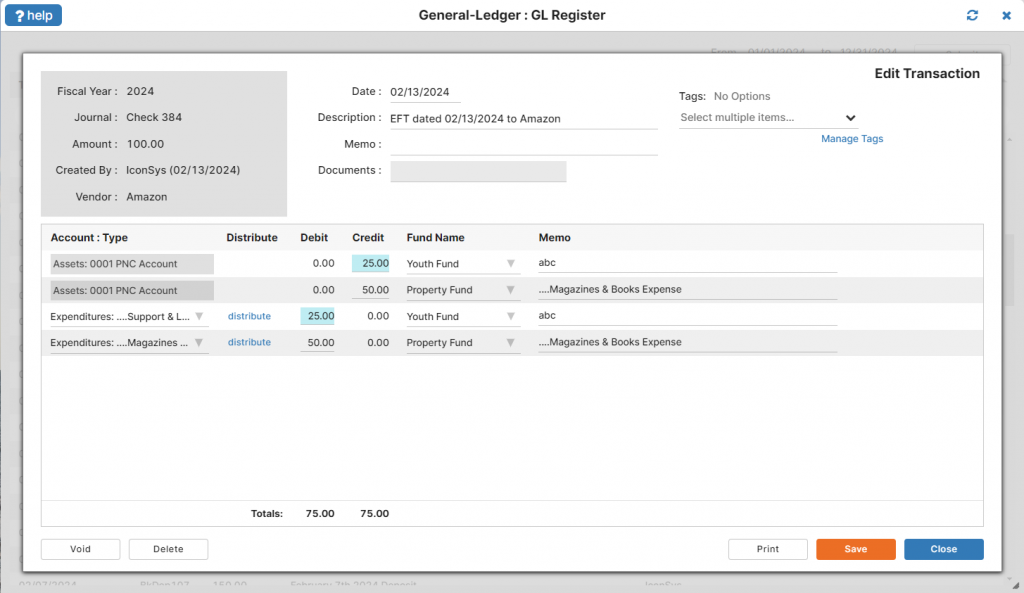
IconCMO allows multiple changes to be made to an entry at once. Any updated fields will turn blue indicating they have changed from the previously saved version of that entry. When finished making changes, click the ‘Save’ button at the bottom of the screen. You will now see the updated amounts throughout the system and will have a record of the changes you made in the Audit Log.
Accounting Mistake #2: Wrong Account
If the wrong checking (asset) account is used, you need to ‘Void’ or ‘Delete’ the transaction. (See the section on Reversing Entries.)
Likewise, if the “Account Types” are different – say, you put in a revenue account and it’s supposed to be an expense account- you can ‘Void’ or ‘Delete’ the transaction if you’d like to create a reversing entry. (See the section on Reversing Entries.) Or you can make the change directly within the entry.
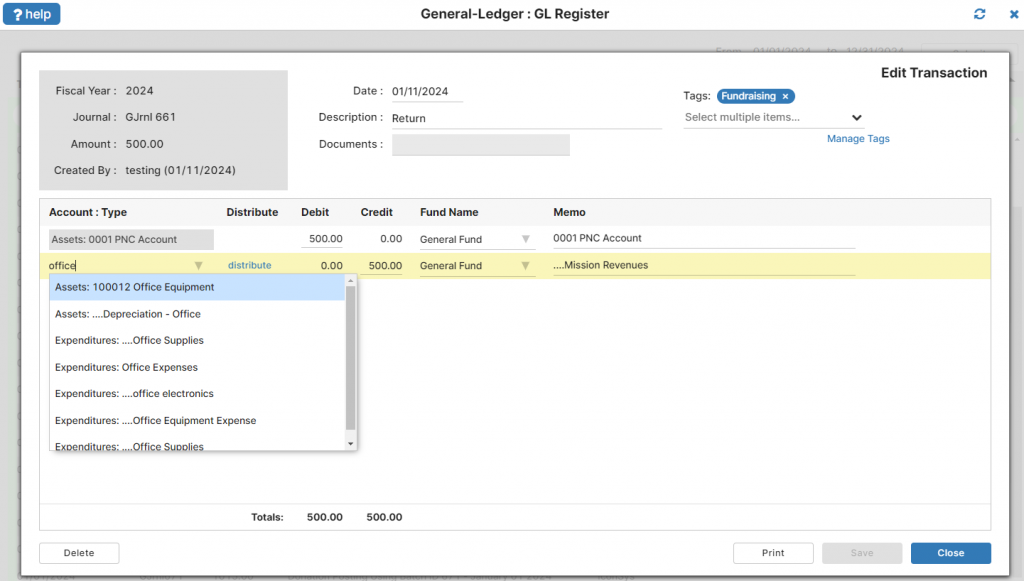
First, look up the transaction in the GL – Register, click on it to open the transaction details, and click the account field you wish to change. This will give you a dropdown menu of all available accounts in your system. Then, choose the account that should be in the transaction by scrolling through the list or typing the name of the account you are looking for.
Again, the updated fields will turn blue indicating they have changed. When finished making changes, click the ‘Save’ button.
Accounting Mistake #3: Wrong Fund
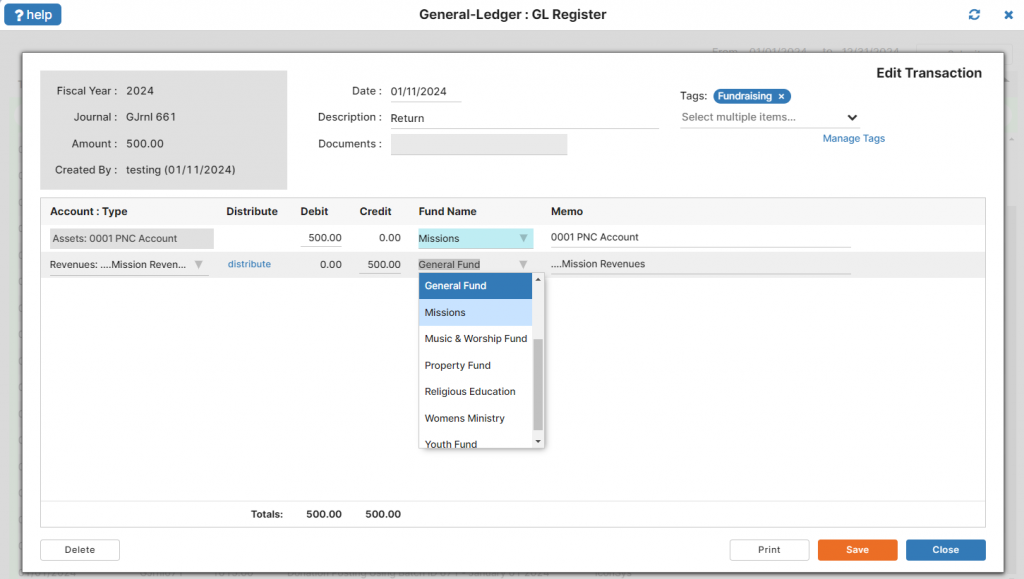
If you selected the wrong fund for all or part of a transaction, you should be able to fix that. You can look up the transaction in the GL – Register, click on it to open the transaction details, and click into the Fund Name field, for the line item you wish to change. This will give you a dropdown menu of all available funds in your system. Choose the fund that should be in the transaction by scrolling through the list or typing the name of the fund you are looking for.
Most importantly, debits and credits must balance within each fund. If you update the fund for a single line item, you will need to update the debit or credit offset as well.
Accounting Mistake #4: Wrong Memo or Description
The description of a transaction is what you see in the GL – Register and other accounting screens that tells you the purpose of a transaction.
Each line item within a transaction also has a memo that can be different from the overall description of the transaction.
To update these fields, locate the transaction in the GL – Register, click on it to open the transaction details, and click into the appropriate field to make changes. The description field is located at the top of the entry and the memo fields, next to each line item.

When finished updating any of these fields by clicking into them and overwriting the existing text, they will highlight blue indicating updates. Click the ‘Save’ button to post your changes.
Accounting Mistake #5: Wrong Transaction Date
If your transactions are showing in your register on the wrong dates, you can simply change the date. Locate the transaction in the GL- Register and click to open the transaction details. Click into the date field to update the entry. You can delete the existing date and overwrite it by typing in a new date including month, day, and year. Or you can use the calendar pop up to choose the specific date you would like.

Accounting Mistake #6: Wrong Vendor
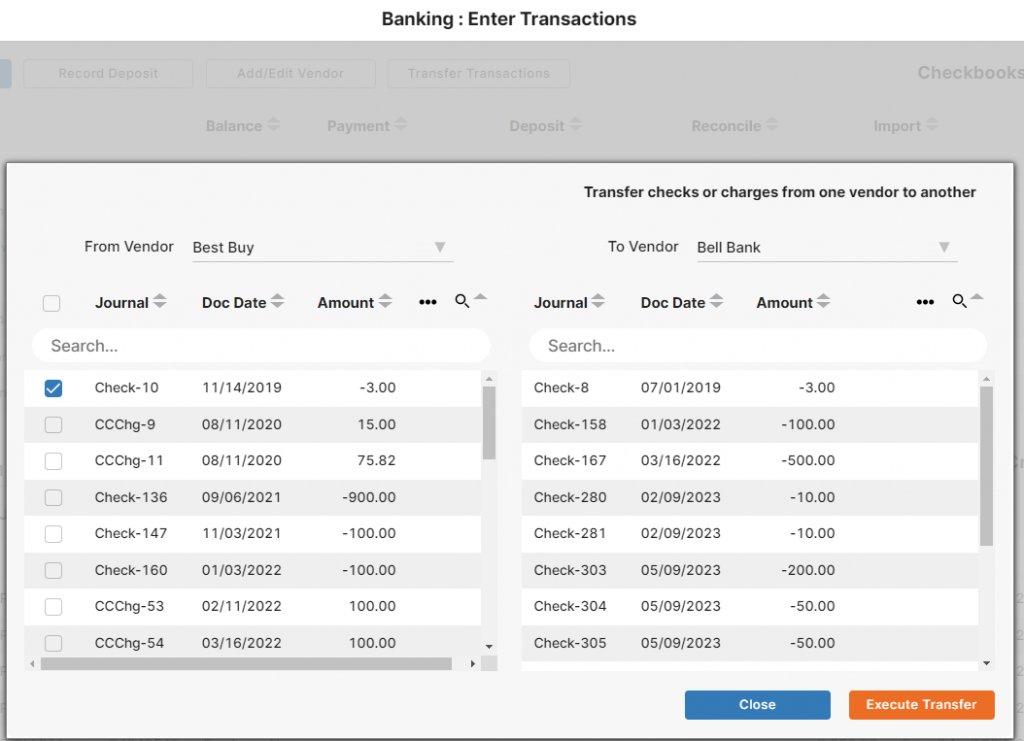
If a transaction was assigned to the wrong vendor, it can easily be transferred to the correct vendor. Go to the Enter Transactions screen in the Banking menu. Click the ‘Transfer Transactions’ button at the top of the screen. In this screen, you can select the incorrectly assigned vendor from a dropdown menu of existing vendors. When selected, all transactions assigned to that vendor will display. Select the transaction(s) that need to be reassigned to the correct vendor. On the right side of this screen, the correct vendor can be selected.
Click ‘Execute Transfer’ to reassign the vendor of the selected transactions.
Not using IconCMO’s accounting system?
See how double entry fund accounting works and why it’s important by visiting our educational page on fund accounting. There, we have detailed information and instructional videos.
Learn more about our church fund accounting system.
Find out more about our church management software.
Leave a Reply