This post was last updated on July 8th, 2024 at 04:19 pm.
Fine Tuning: Some Recent Improvements to IconCMO

I’ve listed some of our latest improvements under the windows to which they apply.
Banking: Checkbook: Checkbook Activity
1. Fiscal Year
This window now displays transactions by fiscal year instead of calendar year, which should make transactions less confusing for anyone whose fiscal year doesn’t match the calendar year.
2. Checkbook Drop Down
The Checkbook drop-down list in the upper left no longer says ‘Select-a-Checkbook’. Now when you open the window, this list automatically shows the first checkbook in the list.
3. Enter Key
You can now enter the check number in the search bar and any matches will show up as seen below.

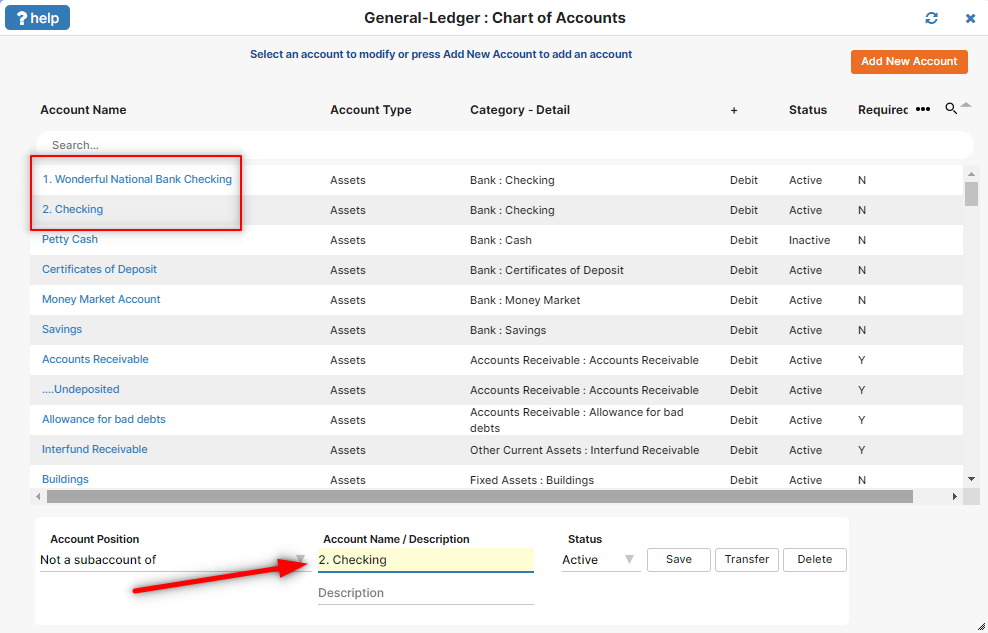
Question: So how do you make the account you use most often appear at the top of the list?
Answer: Go to the chart of accounts (General-Ledger: GL: Chart of Accounts) and click on the desired checking account. Under ‘Account Name’ near the bottom of the window, change the name. By adding an a or a 1 to the beginning of a checking account’s name, you can make it appear first in the drop-down list in ‘Checkbook Activity’.
Banking: Credit Cards: Credit Card Activity
Like the ‘Checkbook Activity’ window, this window now shows the fiscal year and automatically starts with the first credit card account in your list.

People: Groups
The groups windows now links households or individuals in the group lists to the actual household or individual data. Now, you can click on the last name of someone in a group list to pull up their information.
If I’m looking at the group below and want to get Maritsa Ashton’s contact info, I can just click on her last name.
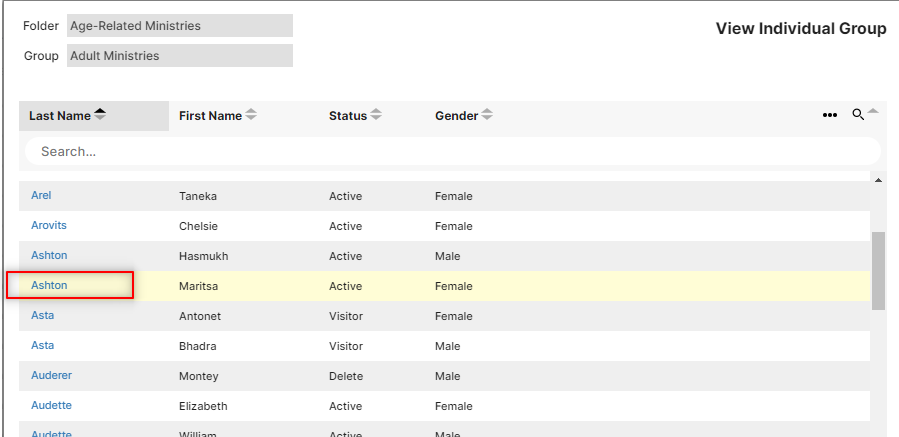
Her individual form will pull up with her contact info.
This will come in very handy for group leaders. If they go to a list of their group members and click on someone’s name, they can make calls, update records, make notes, and send individual emails, all in one spot. However, group leaders won’t be able to do any of this unless administrators give them security access (‘Read Only’ or ‘Read – Write’) to the individual list.
Donations: Funds & Donations
Some changes have been made here that will alleviate some of the confusion that users have had.
Add New Batch
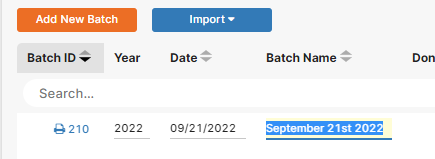
The ‘Add New Batch’ button is how you add a batch to the system. After creating the batch you can name the batch to anything you like as well as change the date of the batch.
Modifying Batch Info
You can modify the batch information by clicking in any of the fields seen below. You can modify the date, batch name, and fiscal year. You can also duplicate the batch, view the log of changes, delete the batch and even export it.

AP: AP Activities: AP Reports
We added the city, state and zip code to the address in the ‘Vendor Contact List’ report.
Settings: Church Membership
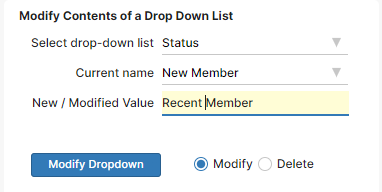
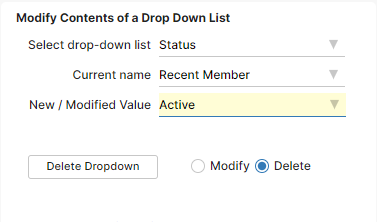
The ‘Save New or Modified’ button and the ‘Delete Selected Option’ button have caused confusion, so we removed them. Now, there’s one button that says ‘Save New’, ‘Modify Drop Down’ or ‘Delete Selected Option’ depending on what you’re trying to do.
Let’s take one of our drop downs—‘Status’—to see how this button of many faces works.
Save New
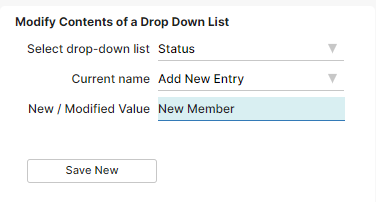
With the ‘Current Values’ field on ‘Add New Entry’, we can type in a new status (maybe ‘New Member’) and click ‘Save New’. ‘New Member’ is now part of your status list.
Modify Drop Down
If we select something from ‘Current Values’, like ‘New Member’, and leave the dot by ‘Modify’ selected, we can type in our modified status name (maybe ‘Recent Member’) and click ‘Modify Drop Down’. Once we click ‘OK’ in the popup, the status has been successfully changed. Like the popup says, any people whose statuses we had changed to ‘New Member’ will be switched to ‘Recent Member’.
Delete Selected Option
But what if we decide we didn’t really need a new status after all, be it ‘New Member’, ‘Recent Member’ or otherwise? We can delete the status by choosing ‘Recent Member’ for ‘Current Values’ and clicking the dot next to ‘Delete’. In the ‘New / Modified Value’ field we then need to ‘Select a Replacement Value’ like ‘Active’ and click ‘Delete Selected Option’. If we click ‘OK’ in the popup, the status will be deleted and all ‘Recent Member’ people will be turned to an ‘Active’ status.
System Defaults in Drop Downs
You may notice that the system defaults no longer appear in the ‘Current Values’ drop down. We took them out of the list because, after all, they can’t be changed anyway.
Thank You!
We’d like to thank our customers for the valuable feedback and suggestions that lead to such improvements, and we hope these changes will ease your IconCMO experience.
I love using this system with one exception and it is an important one. The font is too small when printing reports and labels. The Avery 5160 labels do not work with and I have wasted many sheets trying to adjust.
Thanks, Melanie!
Under the Help Menu in IconCMO, there is a document titled ‘Get help with PDF reports not showing up properly.’ Please read through the Alignment section on page 3 – that should solve the problems you are experiencing with printing labels.
Thank you for the changes as well as for the notifications.
Pretty soon this will be a really great system for churches. Right now it’s only great.
Keep up the work.
Thanks for the comment, Frank! If you have specific suggestions as to how we can improve the system, please make sure to post them in the support forum.